RELOOP BEATMIX
SETUP
Step 1. Connections
Connect the Reloop Beatmix with your computer using the provided USB cable. Connect your Headphones to the front socket and your amplifier/amplified speakers to the Master Out socket at the rear side using an RCA cable.
Step 2. Drivers
Windows : Install the Reloop ASIO drivers from http://www.reloop.com/reloop-beatmix
Mac OSX : No drivers are required to be installed
Step 3. VirtualDJ
Start VirtualDJ and login with your Account credentials. A Pro Infinity, Pro Subscription or Plus Beatmix Controller License is required.
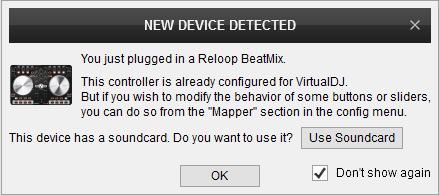
Detection Window
Click to “Use Soundcard”. VirtualDJ will automatically create the necessary audio configuration.
Click to OK
CONTROLS
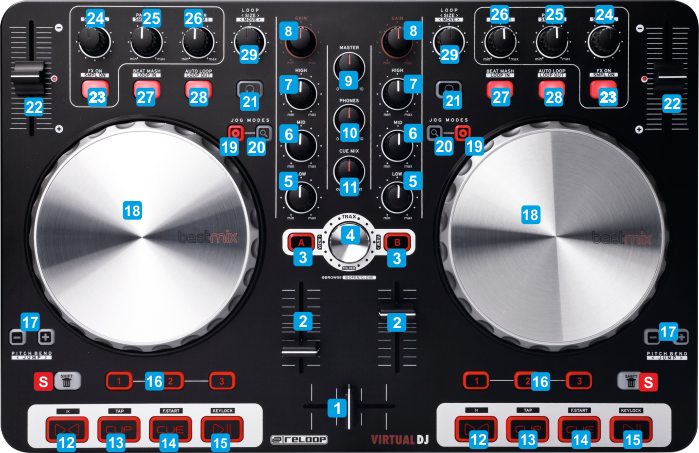
KEY
ACTION
SHIFT (SECONDARY) ACTION
Right button : Turn Video Effect mode on/off (led will blink)
Video Effect mode : Select Video Effect
Video Transition mode : Select Video Transition
Video Effect mode : Adjust 1st Parameter of Video FX (if available)
Video Transition mode : Adjust 1st Parameter of Video Transition (if available)
Video Effect mode : Enable/disable Video Effect
Video Transition mode : Trigger Video Transition
Video Effect mode : Dock Video Effect GUI in Browser
Video Transition mode : Dock Video Transition GUI in Browser
Push: Dock selected Effect's GUI in Browser
Push : Toggle between On/Off and Hold Sampler Trigger mode
Push: Trigger selected loop
INPUTS & OUTPUTS
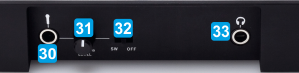
CONNECTION
DESCRIPTION
SW : Microphone signal passes to Software (for recording Microphone)
THRU : Microphone Signal is routed directly to Master Output

